You open your dishwasher after a full cycle, and instead of clean, dry dishes, you find a pool of murky water sitting at the bottom. It is one of the most common — and frustrating — appliance problems homeowners face. If your dishwasher is not draining properly, you are dealing with an issue that will not resolve itself. Left unchecked, standing water in your dishwasher can lead to unpleasant odours, bacterial growth, and even damage to your kitchen floor.
This guide walks through every common cause of a dishwasher that will not drain, provides step-by-step instructions for the fixes you can safely handle yourself, and helps you recognise when it is time to call in a professional technician.
Quick Answer: If your dishwasher is not draining, the most likely culprits are a clogged drain filter, a kinked or blocked drain hose, a failed drain pump, or an improperly connected garbage disposal. Start by removing and cleaning the filter at the bottom of the tub, then check the drain hose for kinks. If those steps do not resolve the problem, the drain pump or check valve may need replacement.
Why Your Dishwasher Is Not Draining: The Most Common Causes
A dishwasher relies on a straightforward drainage path: water is pumped out through a filter, past a check valve, through a drain hose, and into your home's plumbing — typically via a garbage disposal or a dedicated drain line. When any part of that path is obstructed or malfunctioning, water stays where it is.
Here are the seven most common reasons your dishwasher has standing water after a cycle.
1. Clogged Drain Filter
The drain filter sits at the bottom of your dishwasher tub, and its job is to catch food particles, grease, and debris before they enter the drain pump and hose. Over time, this filter becomes packed with residue. A severely clogged filter will slow drainage to a trickle or stop it entirely.
This is the single most common cause of a dishwasher not draining, and it is also the easiest to fix. Most manufacturers recommend cleaning the filter every one to two months, but many homeowners go much longer between cleanings, especially in busy households.
If you have never cleaned your dishwasher filter, there is a good chance this is your problem. Pull the bottom rack out, locate the cylindrical or flat filter assembly at the base of the tub, twist it to remove, and rinse it under hot water. Use a soft brush to scrub away stubborn residue.
2. Kinked or Blocked Drain Hose
The drain hose carries waste water from your dishwasher to the sink drain or garbage disposal. Because this hose runs behind or beneath the dishwasher and cabinetry, it can become kinked when the dishwasher is pushed back into place. It can also develop clogs from grease and food buildup over years of use.
A kinked hose physically restricts water flow. You may notice slow drainage rather than a complete blockage. To inspect the hose, you will need to pull the dishwasher away from the wall — carefully, to avoid damaging the water supply line or electrical connection — and visually check the full length of the hose for sharp bends or crushing.
If the hose is clear of kinks but you suspect a blockage, you can disconnect it from the garbage disposal or drain tailpiece and blow through it or run a long flexible brush through the length to clear debris.
3. Garbage Disposal Connection Issues
If your dishwasher drains through a garbage disposal — as most installations in Toronto homes do — the connection point is a common source of trouble. When a new garbage disposal is installed, the knockout plug on the disposal's dishwasher drain inlet is sometimes left in place. This is a small plastic or metal disc that seals the port from the factory. If it is not removed during installation, your dishwasher has nowhere to drain.
Another issue arises when food waste from the disposal backs up into the dishwasher drain hose. Running the garbage disposal before starting the dishwasher helps clear the drain path and reduces this risk.
If your dishwasher stopped draining right after a new disposal was installed, the knockout plug is almost certainly the culprit.
4. Drain Pump Failure
The drain pump is the component responsible for pushing water out of the dishwasher. It is a small motorised impeller pump that activates during the drain portion of the wash cycle. Drain pumps can fail due to normal wear, debris jamming the impeller, or electrical faults in the pump motor.
When a drain pump fails, you will typically hear no humming or running sound during the drain cycle, or you may hear a grinding noise if the impeller is jammed by a hard object like a piece of glass or a bone fragment.
Testing a drain pump requires a multimeter to check for continuity and resistance across the pump's terminals. If the pump has no continuity or the impeller is physically seized, the pump needs to be replaced. Drain pump replacements are model-specific, so it is important to have your dishwasher's model number ready when ordering parts or scheduling a service call.
5. Check Valve Problems
The check valve — sometimes called a drain valve or flapper valve — sits between the dishwasher tub and the drain hose. Its purpose is to prevent drain water from flowing backward into the dishwasher after a cycle. If this valve becomes stuck in the closed position due to debris or mineral buildup, water cannot exit the dishwasher at all.
Check valves are relatively simple mechanical components, but they are often overlooked during troubleshooting. If you have cleaned the filter, cleared the drain hose, and the drain pump tests fine, the check valve is a logical next place to investigate.
On many dishwasher models, the check valve is integrated into the drain pump assembly. On others, it is a separate component in the drain line beneath the tub. Cleaning or replacing it usually requires tilting the dishwasher or accessing it from the front kickplate area.
6. Air Gap Blockages
An air gap is a small fixture mounted on the sink deck or countertop, and it creates a physical break between the dishwasher drain hose and the sink drain. This prevents contaminated sink water from siphoning back into the dishwasher. Air gaps are required by plumbing code in many municipalities, though not all installations include them.
When an air gap becomes clogged with food debris, water may back up into the dishwasher or leak out of the air gap itself onto the countertop during the drain cycle. If you notice water spurting from your air gap, or if the air gap opening looks obstructed, remove the cap and clean out the internal passages.
7. Drain Solenoid Failure
Some older dishwasher models — particularly certain KitchenAid and Whirlpool units — use a drain solenoid instead of or in addition to a drain pump. The solenoid opens a drain valve at the appropriate time in the cycle to allow water to exit. If the solenoid fails, the valve stays closed and water remains in the tub.
A failed solenoid may produce a buzzing or clicking sound during the drain cycle without actually opening the valve. Like the drain pump, it can be tested with a multimeter. If the solenoid coil is open or shorted, replacement is necessary.
This issue is less common in modern dishwashers, which predominantly use drain pumps, but it still appears in older units found in many North York and Scarborough kitchens.
Step-by-Step: How to Fix a Dishwasher That Will Not Drain
Before attempting any of the following steps, disconnect power to the dishwasher at the breaker panel. If you are not comfortable working with tools or appliance components, contact a qualified technician.
Step 1: Remove Standing Water
Use towels, a shallow container, or a wet/dry vacuum to remove as much standing water from the dishwasher tub as possible. This gives you a clear view of the drain area and makes the remaining steps cleaner and easier.
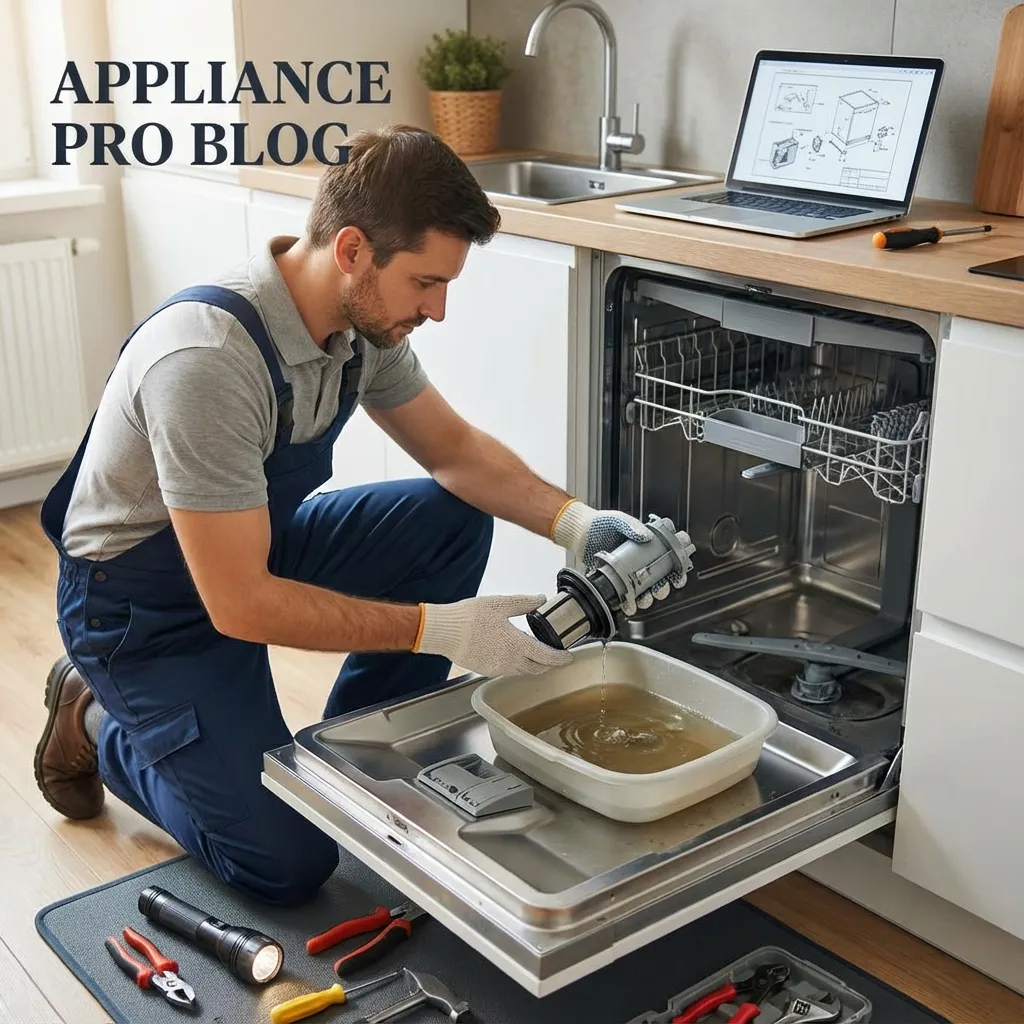
Step 2: Clean the Drain Filter
Pull out the bottom rack. Locate the filter assembly at the base of the tub — it is usually a cylindrical mesh component near the back centre. Twist it counterclockwise (on most models) and lift it out. Rinse it thoroughly under hot running water. Use a nylon brush to scrub away stuck-on food and grease. If the filter is torn or deteriorated, replace it.
While the filter is removed, use a cloth to wipe out the filter housing and check for any large debris — bones, toothpicks, glass shards — that may have bypassed the filter screen.
Step 3: Inspect the Drain Hose
Carefully pull the dishwasher away from the wall to expose the drain hose. Check the full length for kinks, pinches, or damage. Straighten any kinks. If the hose appears to be internally clogged — you can usually feel a firm blockage by squeezing along its length — disconnect it from both ends and flush it with hot water or use a long flexible brush.
When reconnecting the hose, make sure it is routed upward in a high loop beneath the countertop before connecting to the disposal or drain. This high loop prevents backflow and is essential for proper drainage.
Step 4: Check the Garbage Disposal Connection
If your dishwasher drains through a garbage disposal, run the disposal for 30 seconds to clear any food waste. Then check that the drain hose connection is secure and not leaking. If the disposal was recently replaced and the dishwasher stopped draining at the same time, the knockout plug on the disposal's drain inlet needs to be removed. Disconnect power to the disposal, remove the drain hose, and use a hammer and screwdriver to knock out the plug from inside the disposal. Retrieve the plug before reconnecting the hose.
Step 5: Test the Drain Pump
If the filter and hose are clear, the drain pump may be the issue. Access the pump by removing the lower kickplate or, on some models, tilting the dishwasher back. Locate the pump — it is typically at the bottom front or rear of the machine, connected to the drain hose.
Visually inspect the pump impeller for jammed debris. Try spinning the impeller with your finger — it should rotate freely. Use a multimeter set to the resistance (ohms) setting to test continuity across the pump terminals. A healthy pump will show a reading within the range specified in your model's service manual. An open circuit (infinite resistance) or a direct short (near zero) indicates a failed pump.
Step 6: Inspect the Check Valve and Air Gap
Trace the drain hose from the dishwasher to the sink connection. If there is a check valve in the line, remove it and inspect for debris or mineral deposits that might be keeping it stuck closed. Clean or replace as needed.
If your sink has an air gap, remove the decorative cap and clear any buildup inside. A bottle brush works well for this.
Step 7: Run a Test Cycle
After completing your repairs, push the dishwasher back into position — being careful not to kink the drain hose — and run a short cycle with no dishes. Check for proper drainage and listen for any unusual sounds from the pump or drain assembly.
When to Call a Professional
Not every dishwasher drainage problem is a DIY fix. If you have worked through the steps above and your dishwasher still will not drain, or if you discover a failed component that you are not comfortable replacing, it is time to bring in a professional.
Complex issues like a failed drain pump, a damaged control board that is not sending power to the pump, or internal plumbing problems behind cabinetry walls all warrant professional diagnosis. A licensed appliance technician can identify the problem quickly, source the correct replacement part, and complete the repair safely.
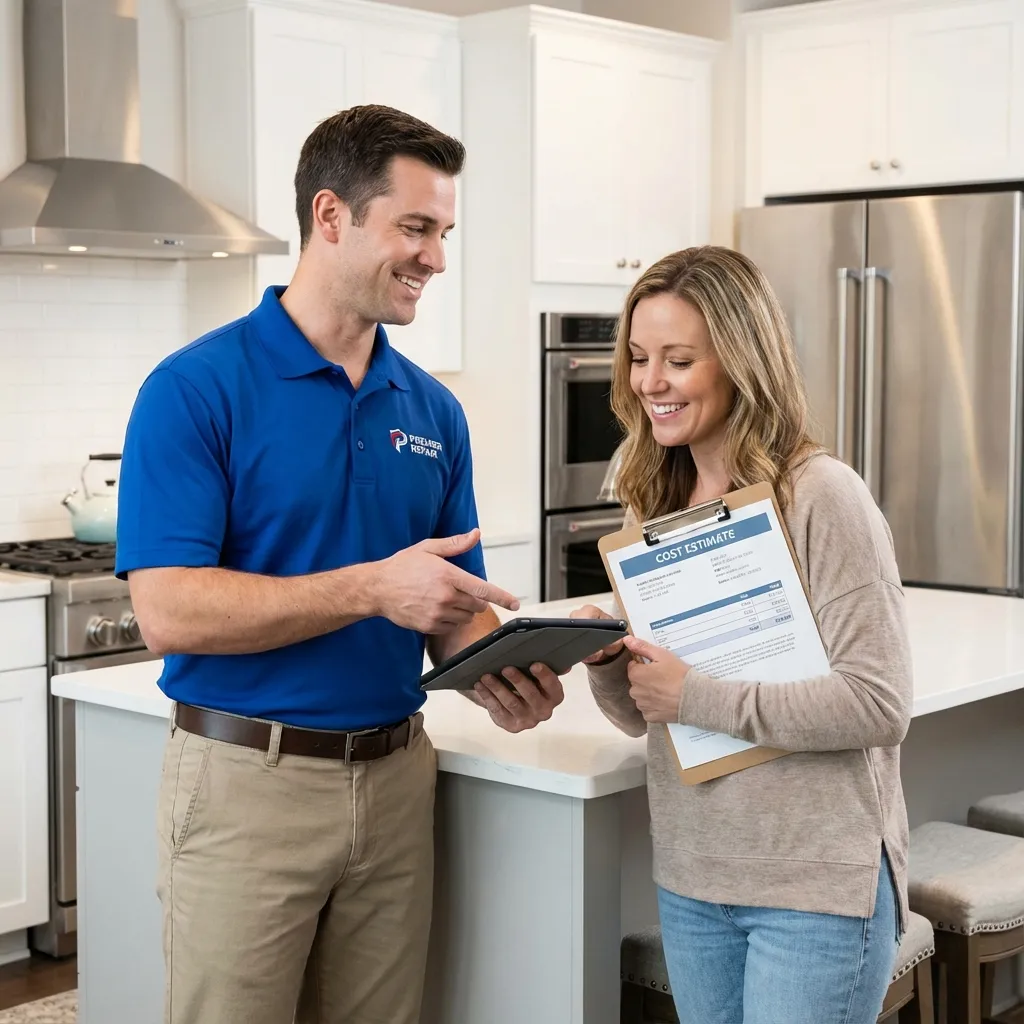
Appliance Service Plus has been serving Toronto homeowners with reliable dishwasher repair for years. Their technicians carry commonly needed parts for major brands including Bosch, KitchenAid, and Samsung, which means many repairs are completed in a single visit. If you are located in Toronto, North York, Scarborough, or anywhere in the GTA, you can schedule a service call without the long wait times that plague larger national service companies.
How to Prevent Future Drainage Problems
Prevention goes a long way toward avoiding repeat drainage failures. Here are practical steps that work for any dishwasher make or model.
Scrape Dishes Before Loading
You do not need to pre-rinse your dishes — modern dishwasher detergents actually work better with some food residue present — but you should scrape off large food scraps, especially fibrous items like celery strings, fruit peels, and chunks of dough. These are the materials most likely to clog your filter and drain hose.
Clean the Filter Regularly
Set a reminder to clean your dishwasher filter every four to six weeks, or more frequently if you run your dishwasher daily. A clean filter is the single most effective defence against drainage problems.
Run the Garbage Disposal First
If your dishwasher drains through a garbage disposal, always run the disposal for a few seconds before starting the dishwasher. This clears the drain path and prevents food waste from backing up into the dishwasher hose.
Use the Right Detergent
Using too much detergent or the wrong type can cause excessive sudsing, which interferes with the drain pump and leaves residue throughout the drain system. Follow your dishwasher manufacturer's recommendations for detergent type and amount.
Inspect the Drain Hose Periodically
Once or twice a year, pull the dishwasher out and check the drain hose for signs of wear, cracking, or kinking. Replace the hose if it shows any deterioration. A preventive hose replacement costs far less than a service call for a flooded kitchen floor.
Cost of Dishwasher Drain Repairs in Toronto
Repair costs vary depending on the component that has failed and the make and model of your dishwasher. Here is a general range of what Toronto homeowners can expect.
Filter Cleaning
Cost: Free if you do it yourself. No parts required, just hot water and a brush.
Drain Hose Replacement
Cost: $15 to $40 for the hose itself, plus one to two hours of labour if you hire a technician. Total professional repair typically runs $100 to $200.
Drain Pump Replacement
Cost: $60 to $180 for the pump depending on the brand and model. With labour, total repair cost is usually in the $200 to $350 range. Bosch and KitchenAid pumps tend to be on the higher end of the parts cost spectrum.
Check Valve Replacement
Cost: $10 to $30 for the valve, with total repair cost around $100 to $175 including labour.
Drain Solenoid Replacement
Cost: $30 to $70 for the solenoid. Total repair with labour typically falls between $150 and $250.
These are approximate figures. For an accurate quote on your specific model, contact Appliance Service Plus for a diagnosis and upfront pricing.
Frequently Asked Questions
Why is there standing water in the bottom of my dishwasher after a cycle?
Standing water after a completed cycle almost always indicates a blockage or component failure somewhere in the drain path. The most common cause is a clogged drain filter. Start there. If the filter is clean, check the drain hose for kinks or clogs, then inspect the drain pump and check valve.
Can I run my dishwasher if it is not draining?
No. Running additional cycles with a drainage problem will add more water to the tub, increasing the risk of overflow and water damage to your kitchen floor and cabinetry. It also puts unnecessary strain on the drain pump motor, which can cause additional damage. Address the drainage issue before running the dishwasher again.
How do I know if my dishwasher drain pump is bad?
A failed drain pump usually produces no sound during the drain cycle, or it may make a humming or grinding noise without actually pumping water. You can test the pump with a multimeter — if the coil shows no continuity, the pump needs replacement. If the impeller is physically jammed and cannot be freed by removing debris, the pump also needs replacement.
Is it normal to have a small amount of water in the dishwasher after a cycle?
A thin layer of water — just enough to cover the drain grate — is normal on many models. This is residual water from the drain hose and is not a cause for concern. However, if the water is deep enough to submerge the heating element or cover the bottom of the door, you have a drainage problem that needs attention.
How much does dishwasher repair cost in Toronto?
Most dishwasher drain repairs in the Toronto area cost between $150 and $350, including parts and labour. Simple fixes like filter cleaning or a hose adjustment may cost less. Complex issues involving control boards or multiple component failures can cost more. A reputable service company will provide a clear estimate before beginning any repair work.
Getting Your Dishwasher Back to Work
A dishwasher that is not draining is a problem you want solved quickly — dirty dishes pile up fast, and standing water creates odour and hygiene concerns in a hurry. The good news is that most drainage issues are caused by simple clogs or straightforward component failures that a homeowner can diagnose and sometimes fix without professional help.
If you have worked through the troubleshooting steps in this guide and your dishwasher still is not draining correctly, do not hesitate to reach out for professional service. For homeowners across Toronto, North York, Scarborough, and the broader GTA, Appliance Service Plus provides prompt, reliable dishwasher repair with technicians experienced on all major brands. Booking a service call is straightforward, and most drain-related repairs are completed in a single visit so your kitchen can get back to normal as quickly as possible.
Need Professional Help?
If the problem persists or seems too complex to handle on your own, our expert technicians are ready to help. Fast, reliable service when you need it.